Using the wave shield

Introduction: The idea behind this post was to describe how I attempted to use a wave shield to play a sound using a photocell as the trigger.

Description: Just for the record, the code for the wave shield is really confusing, but I have gotten it to work – though that was a painful process. After about 45-60 minutes, it became apparent that the problem I had with playing the .wav files on the SD card was due to the SD card being formatted as FAT 12, not FAT 16. Then at least another 30 minutes was spent trying to find a Windows computer to reformat the card. (We don’t have authority on the computer lab PCs.)

Now, it plays “ominous noise” and the intro to BBC America news.


Testing the WAV shield

For my next trick, what I’d like to do is to put this code inside the loop for the LED-shadow sketch.

#include <AF_Wave.h>
#include <avr/pgmspace.h>
#include "util.h"
#include "wave.h"

AF_Wave card;
File f;
Wavefile wave;      // only one!

#define redled 9

uint16_t samplerate;

void setup() {
  Serial.begin(9600);           // set up Serial library at 9600 bps
  Serial.println("Wave test!");

  pinMode(2, OUTPUT);
  pinMode(3, OUTPUT);
  pinMode(4, OUTPUT);
  pinMode(5, OUTPUT);
  pinMode(redled, OUTPUT);

  if (!card.init_card()) {
    putstring_nl("Card init. failed!"); return;
  }
  if (!card.open_partition()) {
    putstring_nl("No partition!"); return;
  }
  if (!card.open_filesys()) {
    putstring_nl("Couldn't open filesys"); return;
  }

 if (!card.open_rootdir()) {
    putstring_nl("Couldn't open dir"); return;
  }

  putstring_nl("Files found:");
  ls();
}

void ls() {
  char name[13];
  int ret;

  card.reset_dir();
  putstring_nl("Files found:");
  while (1) {
    ret = card.get_next_name_in_dir(name);
    if (!ret) {
       card.reset_dir();
       return;
    }
    Serial.println(name);
  }
}

uint8_t tracknum = 0;

void loop() {
   uint8_t i, r;
   char c, name[15];

   card.reset_dir();
   // scroll through the files in the directory
   for (i=0; i<tracknum+1; i++) {
     r = card.get_next_name_in_dir(name);
     if (!r) {
       // ran out of tracks! start over
       tracknum = 0;
       return;
     }
   }
   putstring("\n\rPlaying "); Serial.print(name);
   // reset the directory so we can find the file
   card.reset_dir();
   playcomplete(name);
   tracknum++;
}

void playcomplete(char *name) {
  uint16_t potval;
  uint32_t newsamplerate;

  playfile(name);
  samplerate = wave.dwSamplesPerSec;
  while (wave.isplaying) {
    // you can do stuff here!
    delay(500);
   }
  card.close_file(f);
}

void playfile(char *name) {
   f = card.open_file(name);
   if (!f) {
      putstring_nl(" Couldn't open file"); return;
   }
   if (!wave.create(f)) {
     putstring_nl(" Not a valid WAV"); return;
   }
   // ok time to play!
   wave.play();
}

Considering how strung out I feel regarding finishing my finals before I head to London, I hope to make it alive through this particular process. It seems doubtful.
Phys Comp – Week 6: Serial Communication, Part 2

Working with an accelerometer for serial communication


For our second lab exercise with Serial Communication (which I’m doing early because it seems fun), I got to use an accelerometer for the first time. (Borrowed temporarily from another student.)

In the first half of the lab, I was able to get the ball to move around, and added the smooth(); command to Processing to make the edges of the ellipse to smooth out.

In the second half, I had trouble. I actually couldn’t get the call and response connection to work. I’m not sure what happened. I got the hello as we’d programmed from the Arduino, but as soon as I picked up the breadboard and got input from the accelerometer, the serial monitor seemed like it wasn’t sure if it should be outputting bytes or ASCII and put out both numbers and letters that sometimes made sense as words(?).

I’m not sure what the issue was, but hopefully we’ll go over this in class. I’ll raise my hand and ask, for sure.

Phys Comp: Week 1 – Lab

Lab 1: My experiences with observing people use interactive devices, and setting up a breadboard and an Arduino microcontroller.

Watching People Walk Down the Street Using Interactive Stuff

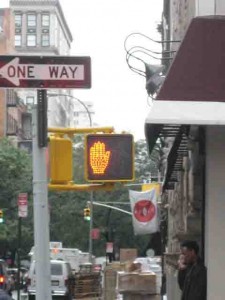
This sort of took place in two stages. In one stage, I walked around thinking about the different types of digital interfaces people rely on, on a day-to-day basis. For instance, buzzers for apartment buildings, cell phones, security cameras, digital cameras, and street lights to go or not when crossing the street. In the second stage, I actually counted the number of people using cell phones or iPods while walking home. I counted 22-25 within a 5 block radius, around 11PM.

rosepantsbuzzer

Crosswalk and man on cell phone

At Union Square, I noticed the ticker display sign advertising the upcoming movies. That, according to Crawford, is not really interactive, but more reactive. Neither is the crosswalk. It’s simply a sign that I read and decide whether to walk (or run) across the street, or just wait for lights to change. But, because the sign doesn’t change based on my actions, it’s not really interactive.

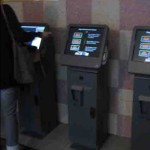
Recently I went to see 9, the movie. (Um, it was cute.) I used the ticketing kiosk to purchase two tickets because it’s usually faster, and I don’t always like to deal with tellers. Sometimes I don’t hear them so well, or they ask me for my phone number or zipcode – which I don’t see is any of their business – or they just aren’t very friendly. The kiosk probably gets my zipcode and phone number, too, when I swipe my credit card, but it seems less intrusive since there’s not an actual person asking for my information. Plus, the machine communicates in written English, colors, and symbols, which usually means I don’t have to interact with accents or styles of speaking that I’m not used to.

kiosk
Movie theater ticketing kiosks

Unfortunately, the machine made a mistake that day. After paying for my tickets, the machine’s touchscreen returned to the “home” screen after printing out only 1 ticket and no receipt, a signal that my transaction was over. I walked away with only 1 ticket; so, in the end, I still had to wait in line. And, yes, the teller and I didn’t really understand each other – she gave me a ticket for the wrong movie.

Setting Up the Arduino and Making Blinky Lights
This was an interesting project. I tried following the instructions as given on the lab for Physical Computing, but I guess I wasn’t naturally born with knowledge on how to set up a breadboard. So, this took a lot of tries to get it right.

Some of my problems were not lining up my ground and power with the right outputs to the switch and LEDs. Some problems were that the wires kept breaking. In the end, though, my biggest problem was the fact that I had 4 wires too many, and none of them crossed over the central divider so nothing was getting powered up. This realization came from after running Arduino a couple of times and getting the same error, then fixing the breadboard and getting the same error. Then, checking…checking…CHECKING…!!! And finally comparing my set-up with someone else’s, and coming to a group conclusion about the extra wires and lack of power.

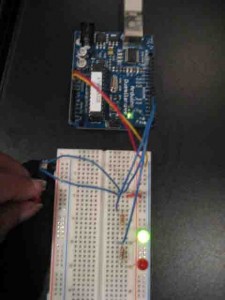
Then, my blinky lights worked and I had lots of fun!

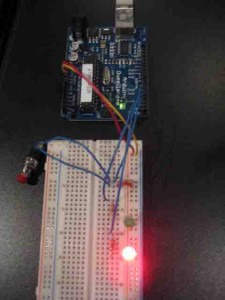
Lighting up the red LED
Turning on a red LED
Lighting up the green LED

! UPDATE !
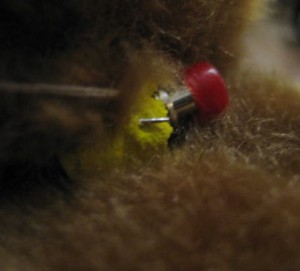
For more stuff to do in my spare time, I sewed a button into this teddy bear’s neck. So, when you squeeze the teddy’s neck, it triggers a light switch.
Button switch + teddy bear

More photos on Flickr!