Introduction
This post is a follow-up on recent changes to my UX portfolio. The changes are detailed below, but here is a quick outline:
- Main images
- Featured projects
- Personal branding
- Images
- Colors
- Language and tone
- Mobile enhancements
- About and Colophon pages
Before I get to these changes, here is a quick update from my last post.
Quick Follow-Up: About and Colophon
As my last post described, my UX Portfolio previously looked like this:
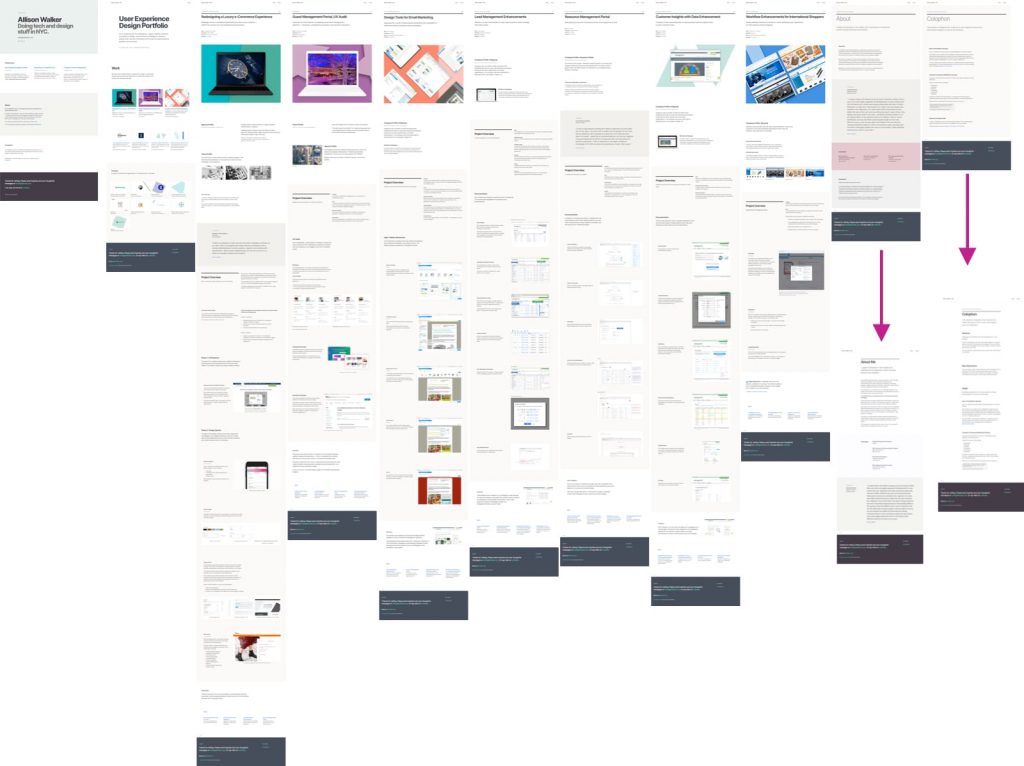
On the About and Colophon pages, on the far right, the arrows show a change from using a thin/fine font weight for the titles to using a heavier font weight. I had also changed the whole page to have much wider margins.
Notice also that, like the About and Colophon pages, some projects do not have images.
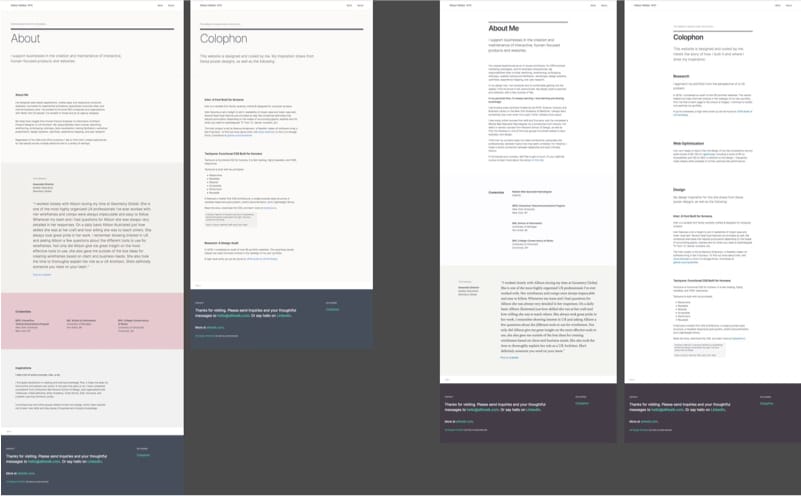
Version 4.2, March 2021 — Major changes
With these March 2021 changes, I’ve massively updated the website. As I did with my last major update, I wrote a little note to myself to document the changes. That note…I wrote right in my Sketch file! Below is an edited copy of what I wrote to myself.
Overview & Goal
The goal of these changes was to build on the theme of unification, which I started in the February update. The changes include the following:
- Inclusion of a main images for projects
- Removing and rearranging projects
- Include principles of personal branding
- Selecting image ratios for project galleries
- Updating the color palette
- Updating the language and tone
- Inclusion of mobile enhancements
- Updates to the About and Colophon pages
Detailed Changes
1. Make sure all projects have a main image.
No More “Swiss Image“
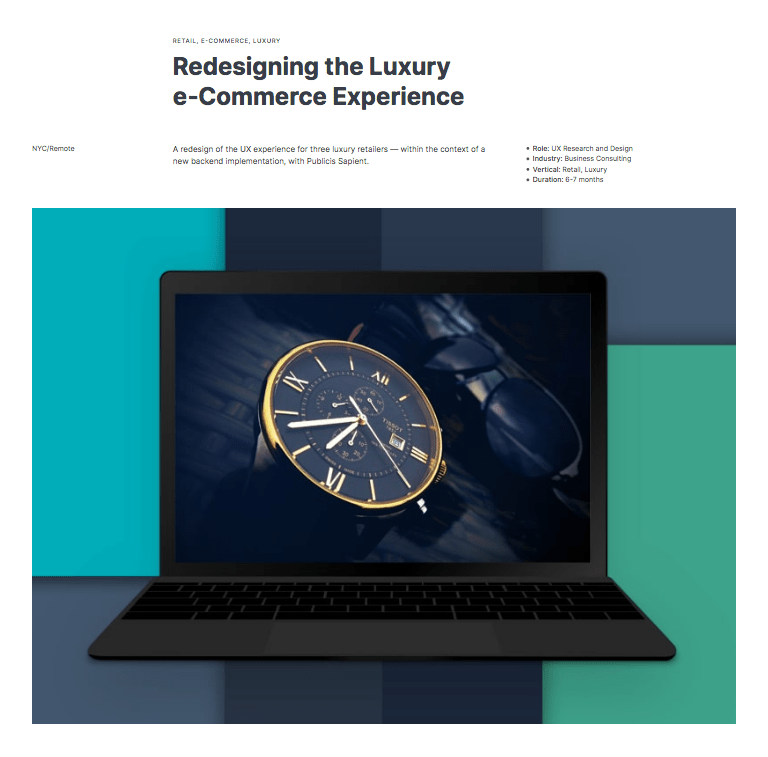
I decided on a new look for headlines on project pages. In my previous update, I’d changed the headlines so that the projects would have a unified look, regardless of whether or not they had an image. However, after more consideration, I felt that the lack of an image for projects was a weakness.
I was sad to move away from the “Swiss poster” -style headline. I originally selected this style due to its asymmetrical appearance and unusual look. I felt this would help my portfolio seem more memorable. Here is a before and after:

2. Removed Adorama project as a page.
My intention for this project was to provide a logical overview of my research activities and thought process. However, due to previous iterations of my portfolio, the presentation of this project was much different from the others:
- The portfolio page was somewhat short
- A comprehensive explanation was available, but required linking to a blog post
While the blog post was comprehensive, I felt the project summary on the site wasn’t very strong. In reconsidering my strategy for the experience of this page, I decided that forcing people to click through to a blog post seemed too much. So, I removed the page.
I felt a sense of nostalgia for this page because this project helped kick off the first changes on this website, from Bootstrap to Tachyons.
But there’s an update: Actually, I put this project back! However, I did eliminate the link to the blog post. Instead, I updated the page itself to include more detail. I put this off for a while because I had assumed that this would be more work than the gain I’d get from it. But the effort wasn’t as bad as I thought. So of course there will be another portfolio update!
3. Scrapped a 7th Project
I had plans to include a 7th project page, which would be just user journeys and maps; sort of stand-alone examples. Ultimately, I decided against it:
- I wasn’t sure it was a strong enough page
- The page was too different compared to the others
- Trade-off between showing more work vs showing too much was imbalanced
It’s possible I may reconsider including this page at a later time, if another project gets eliminated.
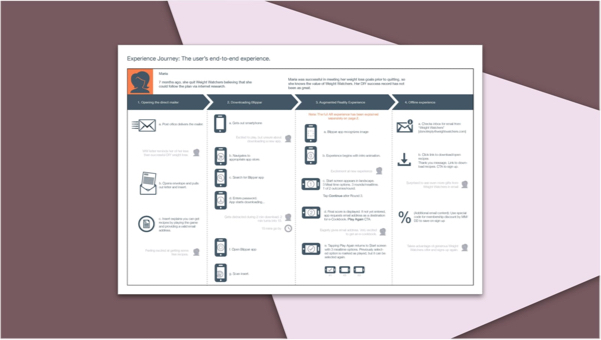
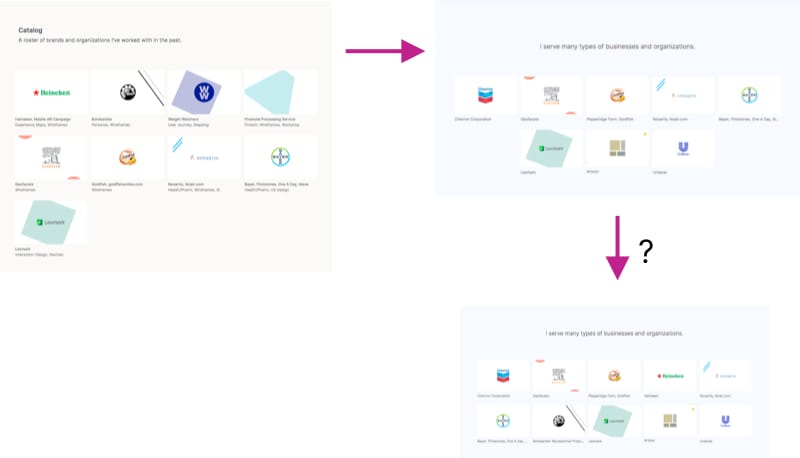
“Catalog” SVG Images
In addition to removing the project page, I also ended up removing some of the SVG images at the bottom of the page. These images would have been available as example projects/links.
I ended up adding two new SVGs. Although, I may need to revisit this and look at which SVGs I want to include.
4. Applying Sales Copy and Personal Branding: Index Page, Testimonials
After attending some webinars on personal branding, self-promotion, and writing sales copy (for personal branding), I realized how powerful testimonials can be on a website.
The good news is that I was already including testimonials. The bad news is that they were a little difficult to find. You had to click on each project to find them, which meant some of them might go unnoticed. They were also were long and wordy.

The change I made was to highlight two quotes on the homepage, and then include a link to a Testimonials section on the About page. Rather than include the full testimonial, I included just a sentence or so. Readers can visit LinkedIn to view the full quotes.

I also changed the home page to reflect more of what I learned during the webinars. For instance, the title is meant to appeal to hiring managers without being too explicit.
The testimonials also provide a sales purpose: as a webinar leader said, testimonials are a way to “borrow” authenticity.
5. Language and Tone
I made a few changes to language and tone with the following activities:
- Editing corrections by reading out loud
- Using an active voice
- Updating project descriptions
- Using original descriptions in project titles and subtitles
- Updating descriptions on the homepage
Read each project out loud
Tying into point #4, I went through every project and read it out loud. This helped me find typos, and make sure each page flowed well. I didn’t find too many typos, but I often repeated myself from section to section. Reading out loud helped me find and fix those issues.
Use an Active Voice
I also took the advice of a personal branding expert to use an active voice, especially when describing myself. Here is an example of a change:
- Old version: I’m the kind of person who can get into the weeds and takes on challenges
- New version: I am comfortable getting into the weeds and taking on challenges.
Maybe this could be better, but overall it’s an improvement.
Updated Project Background/Overview
Under each project image is a little background information about my role, the company, the client, etc. I felt this section was too tall and drew too much attention.
I added a title for the Background section and cut down on the client/company overview for each project by creating a 3-column group of text.

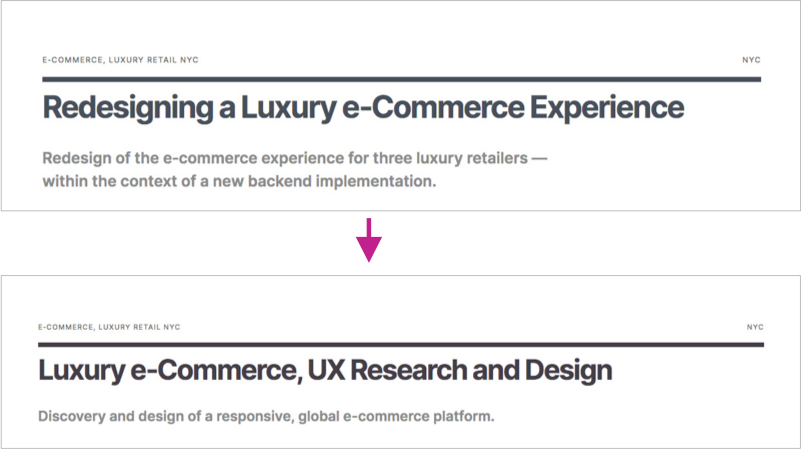
Update Projects with Original Descriptions
I decided maybe I was creating more work for myself by trying to come up with my own interpretation of what a project was about.
My solution was to search through my inbox, and find the specific descriptions used in project or company descriptions, as they were pitched to me. If I couldn’t find an email, I sometimes searched online — sometimes taking descriptions from Wikipedia — for company descriptions. Here’s an example:

Home Page Project Descriptions
I also considered how I described each project on the home page. It turns out I was describing projects in 2 different ways. For instance:
- By project activity: “Redesign for…”
- By project outcome: “Design Tools…”
I decided to update the descriptions. Now the titles describe the project outcome and the description explains the activity/detail.
For another layer of home page detail, I also included the name of the company. I felt I had more space, since I was removing other projects.

6. Color Changes
As I was revisiting some of my research on portfolio websites, and looking for ideas, I came across www.vitsoe.com. This appears to be the website for the company run by the German designer, Dieter Rams.
The website is quite organized. It follows a very clear 3-column layout. And it only has 4 colors: Black, White, Grey, Blue.
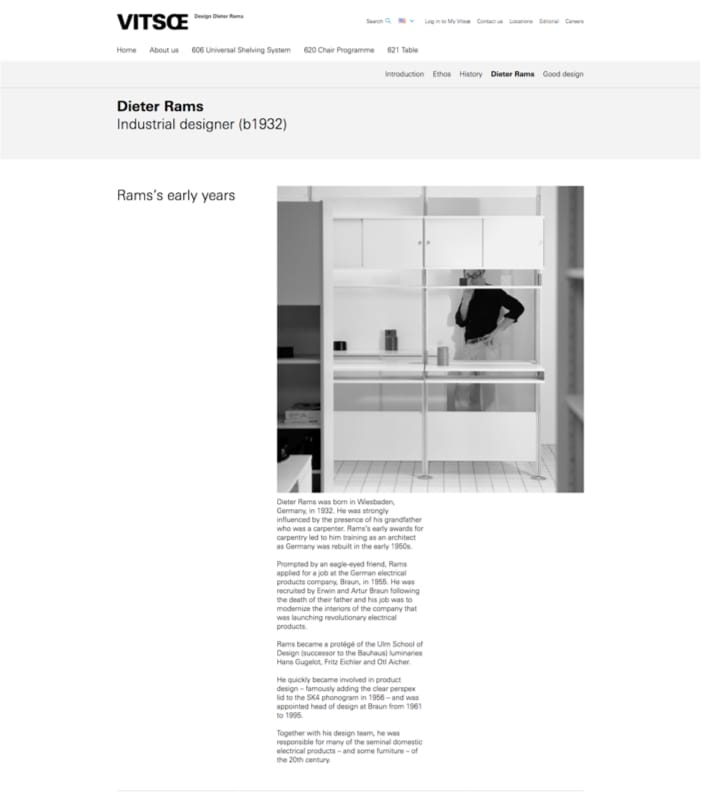
I liked the blue color, which they use for links. After trying it out a bit, I decided to use it for my website — also for links.
After that, I decided to do a lo of color exploration, to make sure all my colors coordinated. This eventually led to an entirely new palette. It was all based on this one color!

Historic Color Reference
I went back to my 2017 website to find good ideas, since it was a good enough portfolio to get me a 6-month gig. Turns out I used a white background that wasn’t pure white. It was actually an extremely light version of the dark navy blue color I had been using for the footer and the page titles. I took that hue and created a few shades to use as background colors.

After generating so many colors, I decided to try out some of the new dark shades to see if maybe I should make some other changes.
The previous primary font color was 220 HSL, which is that very dark navy. The new color is 280 HSL, which is a very dark purple. I think the new color is a little warmer, and lighter shades look kind of lilac.
I updated all of the project images with hues from the new color palette. The new colors are kind of pastel and muted, including greens, purples, and off-whites.

7. Image Ratios
As I mentioned, I had a goal to create more of a unified look across project pages. I knew that one way to do that would be to make sure all the images were the same size or aspect ratio.
This was something I had been thinking about for a while, but I hadn’t quite gotten around to it yet. The Vitsoe.com website, for example, uses 2 sizes: 1×1 and 16×9.
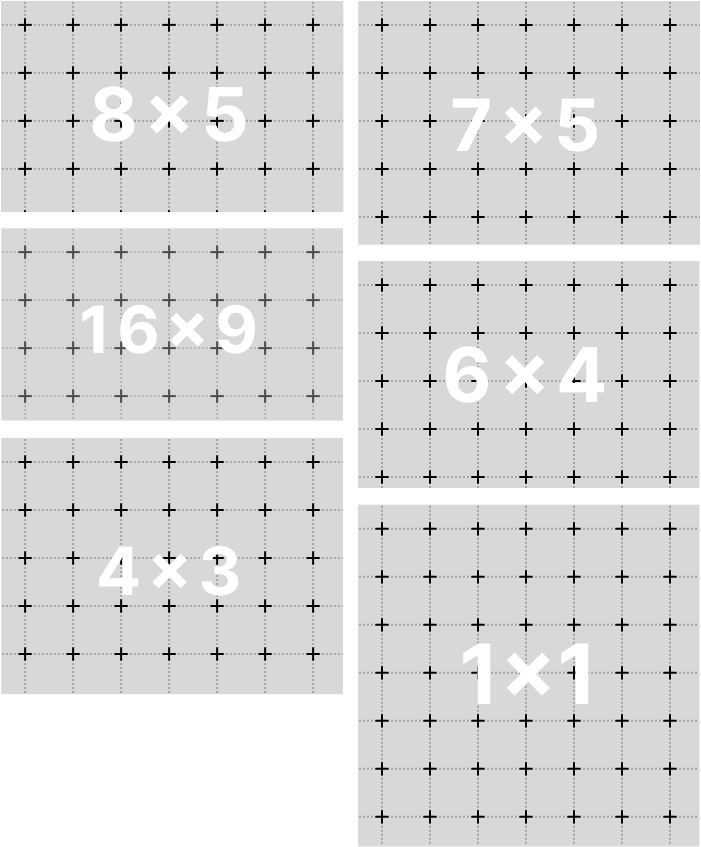
Aspect ratios are built into the CSS framework I’m using. I just needed to apply the styles after making a decision. To decide, I created image masks and tried out a few options. I selected 8×5 for project images and 16×9 for project covers.
8. Mobile only enhancement on project galleries.
I was concerned that mobile users might not know to click on the image to see a larger version or to see more images. I added a message to click the image to view the gallery. The message only appears when the browser is resized to a mobile view.

9. About and Colophon
My research on portfolio websites show that About pages are so varied. As a result, I go back and forth on what this page should look like. I honestly really don’t know what people want to see on About pages!
Ironically, it was after I began looking for a dentist that gave me my inspiration. I saw how some of the dentists described themselves, and I thought it was a good approach.
Here’s how the About page is outlined:
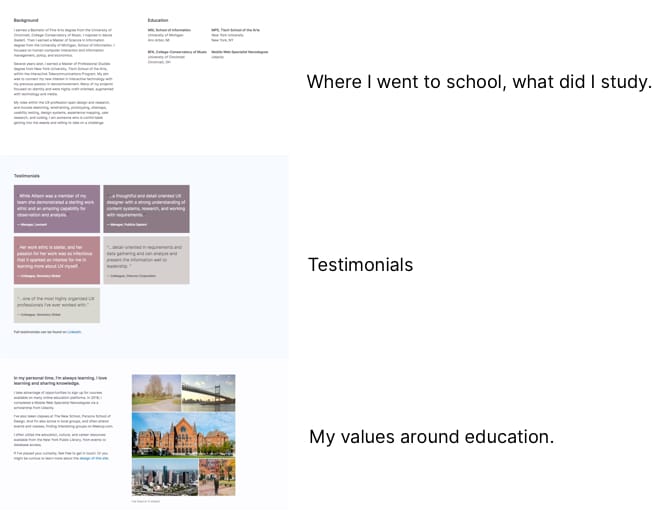
Return to Full-Page Width
For both the Colophon and About, I returned to a full-page width. I think it looks so much better.

Conclusion
Quite a lot of changes! All focusing on creating a unified look, changing language, and updating colors and aspect ratios. To recap the changes:
- Main Image: Revised the header for each project by making sure each page has a main image (except About and Colophon)
- Updated Projects: Removed Adorama project and updated SVGs, though I later changed my mind on the project
- Personal Branding and Testimonials: Added concepts of personal branding and modified the testimonials used on the site
- Language and Tone: Focused on language and tone to revised the wording on the home page, project descriptions, descriptions of myself
- Colors: Updated the color palette to muted colors, after testing a blue I found on vitsoe.com
- Aspect Ratios: Created a more unified look by selecting image ratios in 8×5 and 16×9
- Mobile Enhancements: Added mobile enhancements for project images, with instructions to click to view
- About/Colophon Updates: Updated the bio on the About page and changed page width on the Colophon
And yet the portfolio has changed again! I’m glad I included on the Colophon that the website is always under construction, because that is so true!
Some of those changes have already been explained, but the rest it will be in another update.