This week we connected our Arduino to Processing.
When it happened, I was hoped for sparks and for everything to start moving in slow motion. Instead I got a purple graph. It was still pretty excited. I made funny noises.


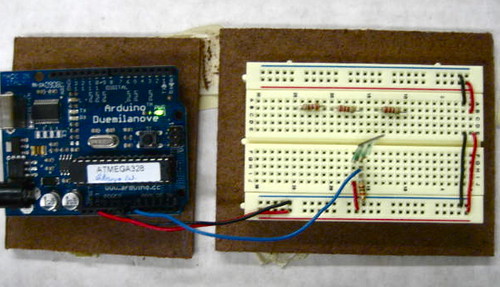
Where I put my stuff for my physical computing class.
What: Self-ticketing machines at movie theaters
How they were used: I expected that people would use them to purchase their tickets. But, I also noticed that people used them to see what movies were playing. And, sometimes they tested the machines to see if they could purchase tickets for a movie that was sold out.
Overall take-away about self-ticketing machines Most of the time we use technology we’re not being watched by people whose opinions we actually care about. Given the context, it seems like the self-ticketing machines are in an environment in which key members of your social group are around you watching you use a machine that could possibly make you look stupid. If I were designing self-ticketing machines, I would keep in mind that clarity and ease of use are important to users, so that they don’t look stupid to the people who are important to them. For the most part that’s true, except in the purchasing part, which is the part that actually matters.
Responsiveness of the machines: At the Loews Theater on 3rd Ave, the machine didn’t respond to very well, which prompted the person using the machine to touch the screen repeatedly.
Confusion when using the credit card swipe: Both at the Loews and at Regal Union Square Stadium 14, I observed at least two people becoming confused when trying to use the credit card machine. At Loews, I was too far away to notice read the screen to see what particular problem the woman was having, but the effect was that she tried to swipe her card about 4-5 times before she finally completed her purchase. At the other theater, the difficulty another person experienced with the credit card swipe had to do with the fact that she kept swiping her card in the wrong direction. Eventually, she was able to figure it out.
Even myself, at yet another theater, City Cinemas Village East, I had difficulty using the machine, too. Twice. First, I used my debit card to pay and when I got to a numeric keyboard display, I assumed that what I needed to press was my PIN, when I actually needed to press my zip code. The result was that I canceled the process. Then when I tried again, I got this screen. It’s a very accurate picture, as you can tell.

When used correctly, the machine takes less than one minute to operate, from selecting a movie to picking up your tickets. I observed someone using the machine in under a minute. Actually, it was probably more like 30 seconds. (I looked away so that the people inside the theater lobby wouldn’t think I was stalking them. When I looked back, the person had finished.) At any stage during the process, it seems that you get about 1.5-2 minutes to complete a step before it asks if you need more time. With continued inactivity, it cancels the process and returns to the “home” screen.
There were a couple of things I noticed about people using these machines that were affected by the general layout of the theater and the general social atmosphere of the environment at the movies.
Theater Layout: The Regal Cinema at Union Square had the most issue with layout affecting self-ticketing machines because at the Loews Theater on 3rd Ave, most people purchase their tickets from the person in the ticket booth outside, so they have their tickets before entering the theater. The biggest effect layout had on people using the self-ticketing machines had to do with crowding. This effect was exacerbated by the social context of people going to the movies.
The crowding effect – In the ticket machine room, there are about 15-18 machines. Most of them are grouped underneath the light board showing the movie titles and schedule. If you’re like me, when you walk into Regal Union Square Stadium 14, the first thing you do is turn right into this room, because it’s faster than waiting in line. I observed that as soon as people walked into this space they tended to stop a few feet from the entrance to the room in order to read the board. Stopping in front of the entrance, of course, blocks anyone else from coming in…which blocks people from using the machines.
(Solution!) To fix this problem, my thought was that if the board were on a different wall, this would get a better flow of people through the space. Particularly if it were on a back wall, since the majority of the people didn’t come more than two-thirds into the room.
Social Context of Use – If you’re not like me when you go to the movies, this probably means you have come to the movies with at least one other person. When people arrived at the theater, they often came with friends and family, or they came alone and then met up with another person. So pretty much anything that a person does at the theater, they do with another person or more. When people are interacting with the self-ticketing machines, what really happens is that there are at least two people standing at one machine watching the screen while one of them actually touches the interface. I also noticed that even when there are more than two people are at the theater together all of them stand around the machine while to purchase their tickets.
This is why I feel that it’s very important that these machines not make people look like they don’t know how to operate a machine. Their friends are watching. Their date is watching. It’s not cool to make someone look dumb when they’re out on a date.
(Even President Obama knows this! President Obama apologizes for messing up journalist’s game.)
My last two observations to note are: “Proximity to the machine” and “What else do people do in self-ticketing space?”.
Proximity: When purchasing tickets, I noticed that when a person reached the point of purchase, he or she took a step closer to the machine. Maybe this behavior is just to get close enough to actually swipe their credit card effectively, or maybe it’s just that people feel better when they’re standing closer to the machine when paying for their tickets. Anyway, getting closer to the machines can be difficult in a crowded theater.
Sometimes, people also had a tendency to sort of play with the machines. Occasionally, a person who clearly did not intend to purchase a ticket would go to a machine and touch it as if they were going to purchase a ticket. When people did this, they often stood a little farther away from the machine, so that the machine was not really too much in their personal space. They also stood at an angle to the machine, so that they were not “squared off” in front of it – shoulders and hips aligned on top of each other so as to create a square, directly facing the machine.
What else do people do in the self-ticketing space: Aside from waiting around and chatting with their friends, the majority of people were using their cell phones. It seemed sometimes that maybe 50% of the people in the space were on the phone. They used their phones before and after purchasing tickets, perhaps to see what other movies were playing nearby, and possibly also to purchase tickets via their phone.
Alone again at the movies, I think I was the only person watching people use the self-ticketing machines.
We were assigned to create a “stupid pet trick” which combines a bunch of stuff we’ve learned in our previous few weeks. It doesn’t have to be logical, which is why it’s called stupid. Some of my classmates made really awesome stupid pets, that weren’t really stupid at all. Mine, I admit, is a little goofy.
For now, I’m going to call it, “The Pickup Artist Bear, for Sensitive Gals and Guys”. Here’s how it works:
Step 1 – The Pledge: The Bear finds someone he/she would like to pick up. Bear sings a sweet song to attract Gal/Guy.
To play the song, you press a button. I installed my button within the neck of the teddy bear.
The song plays while the button is pressed. When you let go of the button, the music stops. When you press again, the song starts off from where it left off.
When you get to the end of the song, the music starts again at the beginning.

Step 2 – The Turn: Guy/Gal is sufficiently impressed with sweet, sweet song. Bear continues the pickup by helping Guy/Gal build self-confidence by showing you how tender your caresses are – and in the process, shows off ability to be affectionate.
For this, you squeeze the Force Sensing Resistors on the breadboard. To do this, I’ve set up 2 analog inputs which take a variable level of force not equally set. So, the same level of force for the Green light will not necessarily work for the Yellow. If you light them both, the red light comes on and teddy bear’s heart lights up. It’s a little bit tricky to do actually, and you can adjust it to really annoy your friends.

Step 3 – The Prestige: The bear has now sufficiently won the heart of Gal/Guy, and now gets you to really show your affection. Bear asks Gal/Guy to spill secrets. Bear shows happiness.


Part I. Working with the Servo motor
I did have some difficulty with setting this up. I think I’ve repressed what went wrong. Anyway, here are photos.


Actually it seems that most of my mistakes are caused by plugging in my wires wrong, after I’ve set things up the first time and tried to experiment with something new. I really dislike that it’s something so small and innocuous as putting being off by one set of rows, but I guess that’s how it works. Maybe I should invest in a Polaroid so I can take immediate photos right away. Or, just be faster on the draw with my own camera.
Or, I could create a new sub-culture: breadboard pornography…
Part II. Tone output
I tried a few of the labs and, for my stupid pet trick, ended up modifying the 2nd lab that uses an array to play notes in a specified order and in a specified duration. Both the notes and the duration of the notes can be set in the code. I set up my arduino to play the first 2 bars of ‘Baa Baa Black Sheep’. It doesn’t sound exactly right, but it’s close enough. And, it’s better than the screeching that I was getting with the basic tone output lab.
What you hear when you listen to the link below, is the sound from a speaker that I took from a set of headphones, and buried within the head of my bear. Consequently, it’s pretty quiet.
To play the song, you press a button. I installed my button within the neck of a teddy bear.
The song plays while the button is pressed. When you let go of the button, the music stops. When you press again, the song starts off from where it left off.
When you get to the end of the song, the music starts again at the beginning.
This week, our Phys Comp lab consisted of combining several previous labs plus the addition of using our multimeters to check the current of electricity. Checking the flow of electricity is something I’ll need to get used to doing, starting with just learning how to read the multimeter dial and learning to choose between A/C or D/C. Anyway, here are my steps:
A. Measuring Voltage: I set up the breadboard with a voltage regulator and a 12V A/C adaptor. Then I tested the input to and the output from the regulator.


B. A Basic LED Circuit: Next, I added a switch and an LED to the breadboard. This is when the voltage regulator came in handy, to decrease the amount of voltage coming into the circuit that the LED was attached to. (If not, it would have been too much current for the LED. That’s also why the regulator was so hot, the extra energy was being emitted as heat.)

C. Components in Series/Parallel: This experiment showed how parallel and series circuits work. Series circuits work like Christmas lights all in a row – when one goes out, the circuit is broken. Parallel circuits share the current, so if one goes out the other lights stay on.


D. Variable Voltage with a Potentiometer: This was pretty similar to “A”, except that now I was using an analog switch to adjust the output of an LED.
This week’s assignment consisted of coming up with a fantasy device, and possibly going crazy using analog sensors. I did both.
First up: the UV-Sunlight watch. This watch detects how much sunlight you’ve received. The benefit to the wearer is that during winter months, you’ll know when you haven’t gotten enough sunlight, and during the summer you’ll know when you’ve gotten too much. I really thought about the design of this one, which may not have been the point, but I do like the final product.


It’s fairly practical and useful, and it was fun to make. But, I would, maybe, agree with the argument that it’s not that fantasmal. Hence, my second fantasy device.
The Unicorner! I learned by the age of six that most humans are incapable of viewing true unicorns. So try as I might, I have never seen a unicorn. My device changes that. This device changes the assumption that there are no unicorns in the world by revealing the true identity of what appear to be ordinary horses, by transforming them into unicorns so that humans can see them! It only works if they were really unicorns to begin with, but it’s only $49.95. It took me under 10 minutes to make, but I added the plastic bag and UPC code later, so maybe 15 minutes of work.


Other ideas included:
Finally, I again took apart my teddy bear and hooked up light switches to two FSR sensors. When the hands of the bear are squeezed, the lights come on. But, because I put variable input into the Arduino, it’s difficult to get them both to light up simultaneously. I will add video later.
Code is here.
int ledPinGreen = 10; // Green pin
int ledPinRed = 9; // Red pin
int ledPinWhite = 11; // White pin
int analogFSRLeft = 0; // Left analog input
int analogFSRRight = 1; // Right analog input
int FSRValueLeft = 1; // Value of the left FSR
int FSRValueRight = 1; // Value of the right FSR
void setup() {
// initialize serial communications at 9600 bps:
Serial.begin(9600);
}
void loop() {
FSRValueLeft = analogRead(analogFSRLeft); // read the left FSR value
// if FSRValueLeft is under 300
// light nothing
// if FSRValueLeft is between 300 and 600
if( FSRValueLeft > 250 && FSRValueLeft < 375 ){
analogWrite(ledPinGreen, FSRValueLeft/4);
} else {
digitalWrite(ledPinGreen, LOW);
}
Serial.println(FSRValueLeft); // print the FSR value
FSRValueRight = analogRead(analogFSRRight); // read the right FSR value
// if FSRValueLeft is between 300 and 600
if( FSRValueRight > 200 && FSRValueRight < 750 ){
analogWrite(ledPinRed, FSRValueRight/4);
} else { // do nothing
digitalWrite(ledPinRed, LOW);
}
/* FSRValueRight = analogRead(analogFSRRight); // read the right FSR value
FSRValueLeft = analogRead(analogFSRLeft); // read the left FSR value
if( FSRValueRight > 200 && FSRValueRight < 750) && ( FSRValueLeft > 315 && FSRValueLeft < 380 ){
analogWrite(ledPinWhite, FSRValueLeft/4, FSRValueRight/4);
} else { // do nothing
digitalWrite(ledPinRed, LOW);
digitalWrite(ledPinGreen, LOW);
}
*/
Serial.println(FSRValueRight); // print the FSR value
delay(10); // gives a 10 millisecond delay
}