Notes on “Holding Yourself Accountable”

Here again is another recap of my notes on a Lynda course. This course was called “Holding Yourself Accountable”. I confess that I first thought this course would be really cheesy. But it actually came in handy for me. You can read about that at the end.

As will all posts with my notes about Lynda videos, what follows is not a comprehensive recap of the video. These are just notes I took while watching. If you’re curious about the individual videos, click through to the course page and check it out.

Introduction
Dorie explains the difference between accountability and responsibility: Responsibility refers to what actions it is your job to do. Accountability is being held to account for actions; ownership. Regardless of position.
Accountability Mindset

Why focus on accountability? Think about what you want people to say about you when you leave a room.

  1. What kind of person do you want to be?
  2. What are the consequences of no accountability. What are the consequences of you being accountable? If you stepped up.
  3. Seek positive examples
Prioritize Correctly
  • Don’t work on stuff that’s not important to the company or boss.
  • Strategically prioritize.
  • Think about your future.
Set Expectations — Don’t over-promise.
  • Use time-tracking tools and techniques to help keep track of your tasks. Use the results to see how long a task took.
  • Manage expectations of others.
  • Share obstacles in advance.
Learn to Focus
  • Everyone gets bored. It’s not necessarily bad to be bored.
  • Have to be willing to give up things we value.
  • Use something like “Pomodoro” to work in 25min sprints. 4 sprints, then one longer break.

Pomodoro works in 6 steps:

  1. Decide on the task to be done.
  2. Set the pomodoro timer (traditionally to 25 minutes).[1]
  3. Work on the task.
  4. End work when the timer rings and put a checkmark on a piece of paper.[5]
  5. If you have fewer than four checkmarks, take a short break (3–5 minutes), then go to step 2.
  6. After four pomodoros, take a longer break (15–30 minutes), reset your checkmark count to zero, then go to step 1.

Find out more: https://francescocirillo.com/pages/pomodoro-technique


Excuses vs Obstacles
  1. Write it down.
  2. Look for patterns. Might be imposing a world view.
  3. Look for solutions. Convince colleagues to work on a project.
Systems for Success
  • Stickk.com
  • End meetings with a recap to help clarify next steps and who is accountable for what outcomes.
  • Use “I always…” or “I never…” to set boundaries. For instance, “I always exercise in the morning.” If you go on a business trip, book a hotel with a gym and bring your gym clothes, etc.
  • Look for equipment solutions, if needed.
  • These tools could be free or paid.
Get Help to Hold Yourself Accountable
  • Create a mastermind group. A group of peers, friends, mentors….
  • Get an accountability partner.
  • Review who you spend time with: Who are the 5 people you spend time with? These people have a lot of influence on your life/behavior.
Pickup After Failure

Get back on track by:

  • Understanding why the failure occurred.
  • Bounce back soon after it occurred – with a tangible, concrete action.
  • Don’t let a small misstep become an excuse for a bigger one. Ex: Don’t “mouth off” to colleagues because you’re in a bad mood.
  • Overcome failure with grace.
Celebrate Successes
  • But be strategic.
  • Don’t celebrate everyday, but enough to avoid burnout.
  • See Tony Schwartz for more on burnout.
Embrace the Identity of Accountability
  • Let positive actions and positive self-conception become a feedback loop. You’re an accountable person because you’re accountable
  • Be someone others can rely on.
  • Be more than just responsible; accountable.

Conclusion: How has this course helped me?

On a recent client project, I had trouble getting the client to commit to dates. And the client was often slow to respond to emails. It would have been easy to let my frustrations overtake my emotions and allow myself to let the project lapse and the timeline go on and on.

But I told myself that I wanted the project to succeed. I was going to make sure it happened. Using this course and the lessons from another course, I focused on the outcome I wanted. I composed emails that made my short and long term goals clear. The client responded and the project eventually concluded successfully. I am now looking forward to my next opportunity to display accountability in personal and professional projects.

Notes on Writing Formal Business Letters and Emails

In a few posts, I’m doing a write-up of my notes following a Lynda course. This course is less than 40 min, but I thought it had some good tips, shown below.


Define Your Goals
  • First a short-term goal (or want), then the longer term goal.
  • Short-term goal is something you want someone to do right away. Action items; “Call me at…”
  • Long-term goal is what you want them to do for a bigger purpose. “I’m looking for help on….”
Research
  • Researching your topic: For instance, if replying to a job description use the language in the job post in your correspondence.
  • Researching your correspondent: Maybe you can find someone specific to send your correspondence to by searching for people on LinkedIn, Twitter, etc. When reaching out, “My research shows you’re the best person to contact. If not…”.
For Tone

The presenter suggested using a website like bab.la for phrases, especially in other languages.

Getting to the Point
  • Put the goal up front
  • Remove confusing details
  • Rearrange and check punctuation
  • Cut out unnecessary words
Phrasal Verbs vs Direct Verbs; Idioms
  • Be direct. The second phrases below are indirect and passive:
    • “I analyzed…” vs “I looked over…”
    • “I hope to…” vs “I had been hoping…”
  • Idioms: Just write it out. Idioms can be misunderstood or misinterpreted.
Follow-Up: TAP – Timeline, Alternatives, Peskiness
  • Timeline: Do you need to follow up because you need an answer?
  • Alternatives: Can you get this info from another source?
  • Peskiness: What will be the downside of following up?

Remember: Don’t assume malice or argue.

Here’s an example: I’m afraid I didn’t get a response to our letter on June 15 about booth space. A prompt reply would be appreciated as we are trying to finalize our travel arrangements. Thank you.

Rule of Thumb for Following Up
  • Don’t follow through using multiple venues. Don’t follow up through email, phone, LinkedIn, etc.
  • If you send an email and get no reply, it’s OK to ask via one other outlet if someone got your email. But don’t bombard them on LinkedIn and Twitter and phone, etc.
  • This was a tip for me, because I had been thinking the more the better!
Continuing the Conversation
  • Keep note of other email addresses, and other people in a CC.
  • People can be generous, if they’re asked. Just be polite.
3 Takeaways
  • Be concise
  • Cooperate
  • There’s a person on the other end
Final Tip

If you ever find yourself stuck with what to say, try recording yourself speaking then transcribing your message.

Notes on Interpersonal Communication

After giving a few recommendations to an acquaintance about my favorite online learning platform, Lynda, I recently watched one of the courses I suggested called Interpersonal Communication. This course is taught by Dorie Clark, who teaches several other business communications courses.

I don’t always take notes, but this time I took a decent amount. I am hoping that re-writing them on my blog, this will help me remember in the moment. (It also helps me throw away some of the papers piling up on my desk.)


9 Notes on Interpersonal Communication

1. How to Make Requests Effectively

Dig your well before you’re thirsty.

  1. Invest in favors before making them.
  2. Explain the context of your request.
  3. Acknowledge you’re requesting a favor. “Thank you for the favor.”
  4. Indicate where your interests are aligned.
  5. Express genuine gratitude.

2. Communicating by Phone or Email?

If it’s a boss or power broker, do they have an opinion or a preference about which they prefer? If so, choose what they prefer. Otherwise, some tips on email vs phone, and benefits of each:

Benefits of Email

  • Simple information
  • Different time zones, travel, late at night
  • Dealing with a talkative person

Benefits of Phone

  • Brainstorming or Troubleshooting
  • Emotional conversation

3. How to Interpret Non-Verbal Cues and What to Watch Out for In Yourself:

She might be cold, but crossed arms signals “closed” body language.
  • (Micro) Expressions of contempt (especially those brief expressions in yourself)
  • Open vs Closed body language
  • Check the direction of the feet; where are they pointed
  • Mismatched facial expressions


4. Communicating with Your Supervisor

Manage expectations by ranking projects.

Get the guidance you need:

  • Have a conversation about how to have conversations. [WARNING] – This will be uncomfortable.
  • Develop an emergency plan, on what to do when your supervisor cannot be reached.
  • Create an operating manual for your job.

Ask the right questions:

  • What can I do that’s most helpful for you right now?
  • How can I prioritize that?
  • Do you see anything that I’m missing?

5. Meetings

Notes on when to speak up in meetings and when to listen:

  • Listen when you don’t know the context
  • Listen when you don’t have a strong opinion
  • Speak when you have relevant experience
  • Speak if you have useful resources
  • Speak if you do have a strong opinion
  • Speak if you have key questions

6. Managing Tricky Communications

Can occur in cross-cultural scenarios when some culture explain things with direct language and some use indirect. Ex: Germany (direct), the US (mostly direct), and Japan (indirect).

In addition, some cultures are very formal and others are more informal. Ex: In the US, using an honorific title like Director or Chairman to refer to someone is way too formal, but some countries it’s standard.

Reference to work done by Andy Molinsky.

7. Interpreting Interruptions

  • Why are they interrupting?
  • Do they want more detail?
  • Is it a culture of interruptions or just one person?

Solutions

  • Talk one on one: Bob, you interrupted me 3 times. If Bob protests: I’m sure you didn’t intend it, but my impression was that you interrupted me 3 times.
  • Change the system: Talk to your manager and take note. Choose an interruption monitor for meetings. Ask meeting organizers to stop interruptions.

8. Responding to Critical Feedback

The most important rule is: know who to take feedback from! There are only two sources of feedback:

  1. Your boss (or client or professor).
  2. Anyone you ask for feedback.

If it’s anyone else, their opinion is not important. 

Other Tips:

  • Don’t respond immediately to feedback. Give yourself time to reflect.
  • If you’re worried about negative feedback: Think of worse-case scenarios between you and your boss. Write down possible criticisms and then your solutions.

9. Communicating as an Introvert

The office is optimized for extroversion, but you can play to your strengths:

  • Get an agenda before the meeting and share your thoughts in written format (even before the meeting).
  • Get a friend to advocate for you, and you can advocate for an introvert.
  • Try creating talking points
  • Create challenges: Ex: “I’m going to be the first to speak up.”
  • Do more pre-work.


Conclusion

If you’re interested in this course, here’s an overview:

Communicating effectively isn’t an innate talent that some people have and others don’t—it’s something that anyone can learn and practice. In this course, learn strategies that can help you hone and master your interpersonal communication skills.

Join personal branding and career expert Dorie Clark as she shares techniques for getting your message across effectively in the workplace, and explains how to tackle potential communication challenges with your colleagues and supervisor. She also discusses how to grapple with tricky situations, taking you through how to handle interruptions, respond to critical feedback, and communicate across cultures.

This course was released 6/13/2017 and rated “Beginner” skill level. So fairly recent and open to everyone. Also it’s only 37m 7s, so easy to fit into a day.

I saw a few more courses I didn’t know about on her author page, about how to hold yourself accountable and body language for women — also around 30 minutes. Maybe I’ll take those and write more notes.

Learning about the DOM in JavaScript, jQuery, and More

A recap of my recent experience with an intermediate JavaScript course on Lynda.

Screenshot of Lynda course
Click the image to watch the preview for ‘The DOM in JavaScript, jQuery, AngularJS, and React’ on Lynda.com.

I recently finished an interesting course on the DOM and different versions of JavaScript. I liked that it was just a taste of JavaScript, jQuery, Angular, and React. It’s called The DOM in JavaScript, jQuery, AngularJS, and React. It was released in 2017.

Much of the course was focused on regular JavaScript. I’m glad I’ve spent so much time studying JavaScript, because a lot of basic things didn’t need to be explained for me in this course.

Although I know about the DOM, using HTML, this focus on the DOM using JavaScript was an interesting approach. For instance, traversing the DOM (with classes and IDs) was fun:

document.body.children[4].children[1]

This selects the 5th child of the body, then the 2nd child from that. This is almost like using CSS selectors to select parent and child elements.

One of the things I love about Lynda is that they recommend additional courses to learn more about related topics. A few courses the instructor recommended included:

  • JavaScript Essential Training
  • jQuery for Web Designers
  • Angular 2 Essential Training
  • ReactJS Essential Training

They may have updated it, but I’ve already taken the JavaScript Essentials course before, so I’ll check if the others are already on my list. Angular is past version 2 by now, but maybe it’s easier to get started with that version.


Display Text Typography Projects

Continuing with my ongoing education in design, I focused recently on typography and layout. And I went through two Lynda.com courses to do it.

Those courses are called Learning to Set Display Type and Learning Graphic Design: Set Perfect Text. They are both taught by John McWade.

The classes John McWade teaches are exceptional because he is such an excellent instructor and quite good at explaining the concepts he is trying to get across. I recommend both of the classes I mentioned above, as well as other classes in the Lynda library by this instructor. Here are previews of these two courses.


Neither of these classes include exercise files. But after watching both of these courses I was inspired and motivated to try my own type projects, to put his advice into use.

Type Rules I Learned

It sounds basic, but I wasn’t aware that some fonts have additional glyphs that can be used instead of the regular font. Bookmania is an example of a font with tons of extra options for letters.
I also learned about justifying text, using hyphenation and spacing to help words fit. I also learned about using hair-spaces and thin-spaces, and using drop-caps.
Actually, the class doesn’t go into how exactly one would create a dropcap. So, I turned to YouTube – or as I like to call it, the second internet – to find another tutorial.
And I found one. This one is actually by another Lynda instructor, Anne-Marie Concepcion. She makes it look so easy.

 As soon as I learned how to do this, I wanted to try it right away. Voila!

Type Stuff I Made

dropcaps

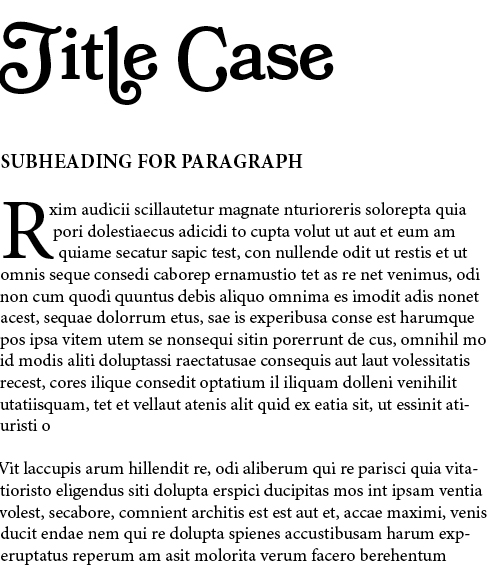
Now we’re getting to the fun part. First is the dropcap I made after watching the YouTube video.
Drop cap and Display type
Used Bookmania and a Lynda tutorial to create a dropcap.

In this one, I was able to move the text corners so that the text flowed around the dropcap R. Looks cool.

I was inspired to use the extra glyphs in Bookmania to create my own name. I used the smallcap version of the letter ‘A’ in the word, “alliwalk”.

Projects with Images

I like to collect stock photos – I know, it’s a bad habit – because I think that someday I’ll use one for a project. So, I end up with many stock photos that I don’t use. (Sometimes I use them here on my blog.) Well, I was finally able to put a few to good use.

All Dressed Up

The first is this nice “Man in a suit putting on a tie”. I wasn’t sure what I was going for. Maybe a book cover or magazine spread. But, I think what I have is some sort of flyer concept.

This image uses Bickham Script Pro and Didot.

This image uses Bickham Script Pro, which has tons of fancy glyphs, and Didot. Didot has a certain fashionable sense to it, and I think it works. I wanted this to have a bespoke aura about it, yet still masculine. The italicized Dido, and the extra swirls from Bickham Script Pro help to get that across.

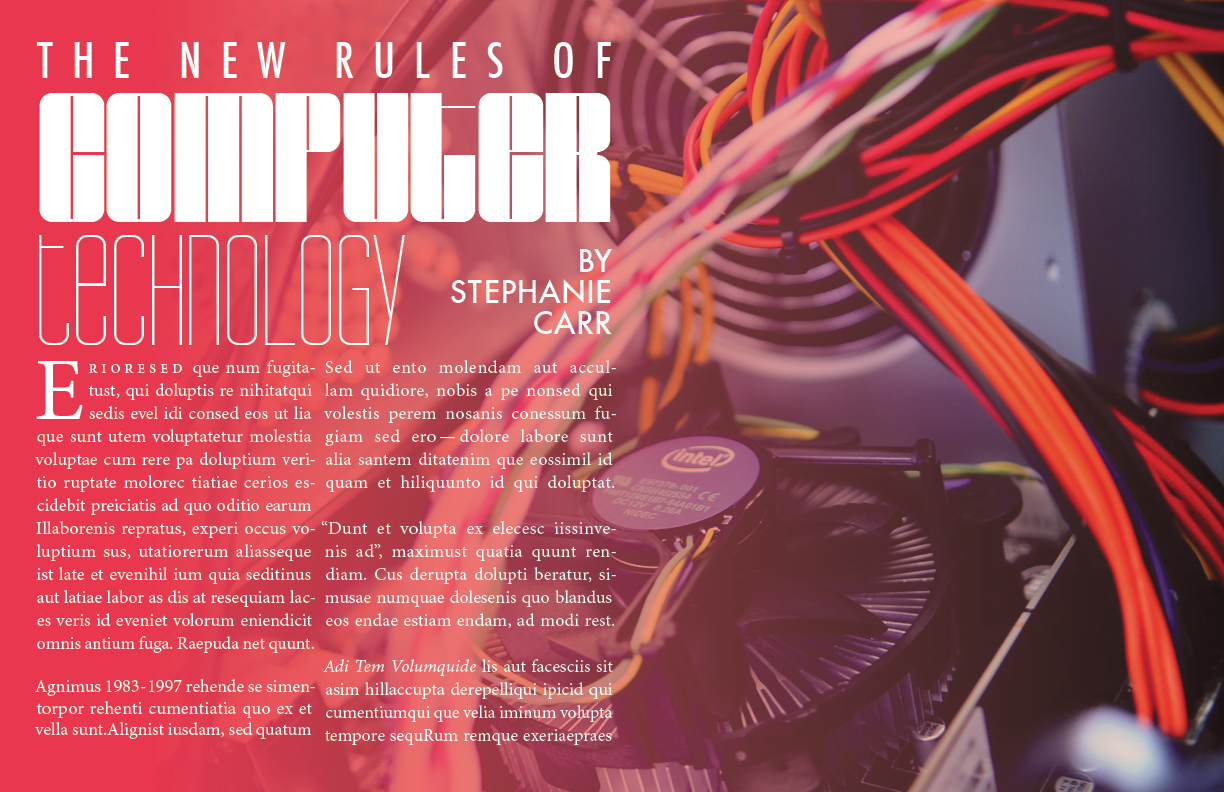
New rules of computer technology

BarryW90-Black, BarryW90-Thin, Futura Medium, and Minion Pro

In this case I wanted to use justified type, as John McWade had shown in his course. I stuck with Minion Pro, because it was easier to work with. And I added in a few random elements – a few numbers, some quotes, some pronouns – just to incorporate some of the lessons from the course. One thing I wasn’t able to replicate was keeping the subsequent letters from the word in the dropcap closer than the other words on lines 2 and 3. InDesign just wasn’t cooperating for me.

But I did enjoy this project. BarryW90-Black and Thin are highly stylized, very technical-looking fonts. I was inspired to find a new stock photo for them. Something computer-oriented.


Next time…

In my next post, I’ll talk about a few more projects in InDesign, and another type/logo(!) project I made for a fake company I invented called Apex Travel.