Using Arduino and Processing together

Today I got up early and fooled around in Processing…for hours. I was playing with the Minim sound library, which I’d planned to use for my Intro to Computing Media project, an mp3 player. After sitting around for so long, I could how I was getting both noticeably older in age, but also wiser about Minim. Why sit around and program something completely different when I could put the two together? Well, my fear with combing my two projects, ICM and PhysComp, was that I’d skimp out on one or the other and not fully challenge myself. However, due to the MEX conference – to be blogged about soon! – my schedule is shorter than I’d like. Something’s gotta give. Sadly, it’ll have to be a little bit here and there on my projects.

Anyway, today, I worked on combining my Arduino code and my Processing code using serial output to play a song. Before discussing this, a little recap:

Create the code to turn on/off LEDs set at a threshold. Using the map() function and an if/else statement, I can now reliably turn off and on an LED as though it were a switch.
Here’s the code for the mapping and if/else statement part:

phoVal1 = analogRead(phoPin1);
  //map the photocell values and turn on the light
  phoVal1 = map(phoVal1, 0, 255, 255, 0);
  if (phoVal1>=0) {
    digitalWrite(pholed1,HIGH);
  }
  else{
    digitalWrite(pholed1,LOW);
  }

Here’s the code for the FSR:

FSRValue = analogRead(analogFSR); // read the left FSR value
  analogWrite(motorpin, FSRValue/4);

The next step was to combine this code with the Minim library in Processing. But first, write code in Processing! Here is where several hours with Minim came in handy. I was able to hobble together enough code to be able to play and pause a song. I haven’t yet created any arrays, for a media list, but that’s next, as well as the ability to move through the array. After that I sent the output in serial DEC to Processing. I just added this little bit of code:

if (xpos > 100){
 song.play();

After that, I was able to use the serial output from the FSR and Photocell to trigger the song.play(); function. I suppose, I could find a audio visualization program to tweak, so that I can make a pretty picture show when a song plays, assuming I play a song.

Next I’ll need to refine all the code, and plan out more of how I want the sensors to interact with the plants. And, I need to get some plants.

UPDATE: Code is not working as expected. Processing is just playing a song when the sketch is run. I need to figure this out some more.
Still thinking about changing my final project idea: interactive plant vs blinky lights?

A discussion Monday night got me thinking about my Phys comp final again. I like the bionic gardening, but I also want something really fun. The other student I was talking with was trying to convince me to do my original-ish LED light board idea. So, at home I thought about it a little bit more.

If I had the time to do this, I’d get 108 RGB LEDs, and a perfboard in 5″ x 5″ squares to measure a rectangle 30″ L x 10″ H. Each LED would be spaced 2.5″ from its neighbor, so that there would be 9 LEDs per square.

The interaction: When a user walks by, the LEDs light up in response. The color of the LED depends on how far or close the user is to the LED board. So, the closer, the more red; basically it goes through the visible light spectrum starting from indigo to red.

In addition, my original idea had sound output as well. Sound might be too confusing. I sort of just like the LEDs. I think this is something that would look spectacular, but I just don’t feel that I have enough time.

UPDATE: Perhaps I’ll just do this on my own, anyway. Seems easier than the UV Sunlight watch, but more difficult than the talking plant. In any case, I need to order ton 0′ parts, soon!

Using the wave shield

Introduction: The idea behind this post was to describe how I attempted to use a wave shield to play a sound using a photocell as the trigger.

Description: Just for the record, the code for the wave shield is really confusing, but I have gotten it to work – though that was a painful process. After about 45-60 minutes, it became apparent that the problem I had with playing the .wav files on the SD card was due to the SD card being formatted as FAT 12, not FAT 16. Then at least another 30 minutes was spent trying to find a Windows computer to reformat the card. (We don’t have authority on the computer lab PCs.)

Now, it plays “ominous noise” and the intro to BBC America news.


Testing the WAV shield

For my next trick, what I’d like to do is to put this code inside the loop for the LED-shadow sketch.

#include <AF_Wave.h>
#include <avr/pgmspace.h>
#include "util.h"
#include "wave.h"

AF_Wave card;
File f;
Wavefile wave;      // only one!

#define redled 9

uint16_t samplerate;

void setup() {
  Serial.begin(9600);           // set up Serial library at 9600 bps
  Serial.println("Wave test!");

  pinMode(2, OUTPUT);
  pinMode(3, OUTPUT);
  pinMode(4, OUTPUT);
  pinMode(5, OUTPUT);
  pinMode(redled, OUTPUT);

  if (!card.init_card()) {
    putstring_nl("Card init. failed!"); return;
  }
  if (!card.open_partition()) {
    putstring_nl("No partition!"); return;
  }
  if (!card.open_filesys()) {
    putstring_nl("Couldn't open filesys"); return;
  }

 if (!card.open_rootdir()) {
    putstring_nl("Couldn't open dir"); return;
  }

  putstring_nl("Files found:");
  ls();
}

void ls() {
  char name[13];
  int ret;

  card.reset_dir();
  putstring_nl("Files found:");
  while (1) {
    ret = card.get_next_name_in_dir(name);
    if (!ret) {
       card.reset_dir();
       return;
    }
    Serial.println(name);
  }
}

uint8_t tracknum = 0;

void loop() {
   uint8_t i, r;
   char c, name[15];

   card.reset_dir();
   // scroll through the files in the directory
   for (i=0; i<tracknum+1; i++) {
     r = card.get_next_name_in_dir(name);
     if (!r) {
       // ran out of tracks! start over
       tracknum = 0;
       return;
     }
   }
   putstring("\n\rPlaying "); Serial.print(name);
   // reset the directory so we can find the file
   card.reset_dir();
   playcomplete(name);
   tracknum++;
}

void playcomplete(char *name) {
  uint16_t potval;
  uint32_t newsamplerate;

  playfile(name);
  samplerate = wave.dwSamplesPerSec;
  while (wave.isplaying) {
    // you can do stuff here!
    delay(500);
   }
  card.close_file(f);
}

void playfile(char *name) {
   f = card.open_file(name);
   if (!f) {
      putstring_nl(" Couldn't open file"); return;
   }
   if (!wave.create(f)) {
     putstring_nl(" Not a valid WAV"); return;
   }
   // ok time to play!
   wave.play();
}

Considering how strung out I feel regarding finishing my finals before I head to London, I hope to make it alive through this particular process. It seems doubtful.

Using FSRs to turn on vibration motorsor

Tonight I was working on putting together some of the pieces for my Android Pet Plant.

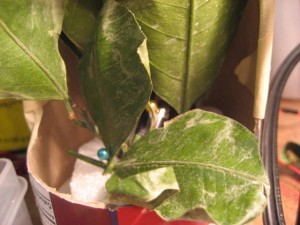
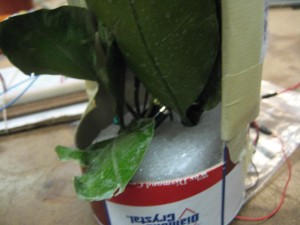
To make the plant vibrate, I plan to use the 1″ FSRs around the flower pot which will trigger at least 2 vibration motors. To test this out, I cut open a cardboard Diamond Crystal salt container and stuck a piece of foam in the bottom of the container. Then I poked holes through the foam and through them I shoved some leaves that I got from someone’s fruit and the two motors, which I taped to the leaves with electrical tape.

On the outside of the container, I attached the FSRs with masking tape and then covered them in this fake leather stuff, which I flipped over so the soft part faced out. I wrote Pet Me on them, too. All of that went into the Arduino and, when I switched it on, I got vibration when I “petted” the pot.

motors
motors


The code was fairly simple. I simply reused something I’d written before. I suppose I should change the code from LEDs to motors, but I’m just trying to make it work for now.

int analogFSR = 4; // FSR analog input
int motorpin = 10; // Motor pin
int FSRValue = 1; // Value of the FSR

void setup() {
  // initialize serial communications at 9600 bps:
  Serial.begin(9600);
}

void loop() {
  FSRValue = analogRead(analogFSR); // read the left FSR value
  analogWrite(motorpin, FSRValue/4);
  Serial.println(FSRValue); // print the FSR value back to the

  delay(500); // gives a 10 millisecond delay
}

Intro to Physical Computing: Final Project…Rejects

How did I come to my final idea. Well, I rejected many other ideas first. For instance…

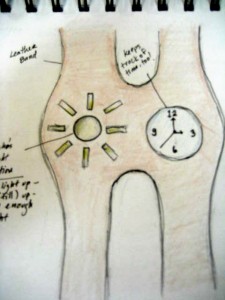
UV-Sunlight Watch: I thought I’d try to make one of my fantasy devices. A UV-Sunlight watch that helps you get a good amount of daily sunlight. However, after some research, and learning that UV calculators really do exist, I was a little put off by the idea. A sunlight detection watch is useful, but I wanted to try something original and something that I would like. (Not to say that the idea of a plant that responds is completely original….)
UV-Sunlight watch

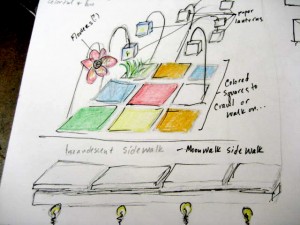
Interactive Floor: I thought about some kind of sidewalk/responsive floor. This came from the knowledge I’d gained in making a switch for the balance board, media controller. I considered a few options for this: the Moonwalk sidewalk, a child’s play area, etc. After I while, I thought that while it could be very colorful and fun, I wanted to try something a little bit more substantive.interactive floor

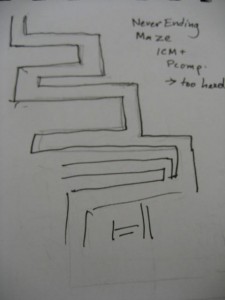
Others: I thought about a never-ending puzzle that would use an accelerometer to control a ball’s descent through a visual maze. Seemed really difficult.
maze


Also, I didn’t properly document it, but I thought about a portable photo booth. I got this idea from a rectangle that had been left in the junk bin and reminded me of a frame. I thought about walking around and seeing the world in photographs. How would this work? Well, my idea was that you would carry a frame on your shoulders and people could take photos with you if they wanted in your photo booth. I did not go with this idea out of fear of the expense of potentially additional camera equipment.

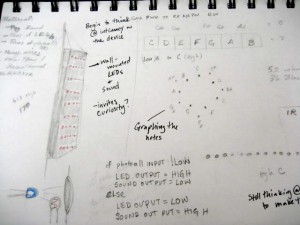
Light-Piano: This idea was to create a grid of LEDs and photocells that, after reaching a certain threshold, would trigger a sound.
LED Piano1


The sounds I wanted would correlate to a musical scale, so essentially you could play a grid of LEDs. I kind of went with this for a while. I thought it would look pretty and you could put it on a wall. I sort of wanted it to look like this, but cost MUCH less.

I talked about these ideas to other students and they appreciated all of my ideas, and they came up with suggestions for me as well. But, something about the idea seemed…oh, unspecific. Like the project was not thoughtful enough. Eventually, as I thought about sensors and realizing that I could use a much smaller grid, with my own sounds, somehow the idea of sighing came to me. Possibly because I was sitting by a window and there was a small plant nearby.

Well, I’ve talked to my fellow students again, about my new idea and they all like it, too. This time however, when I say, “The plant will sigh, like it’s happy to see you, when you come close to it,” they say, “Awwww….” Cute.