Communications Lab: Week 5 — Response to “Understanding Comics”

Chapters 1 and 2 were interesting summarizations of psychological patterns, as well as introducing the idea of simple, yet complex, design.

In Chapter 3, I found interesting the discussion on the Visual Iconography of comics. That is, visual iconography is used by comics as its “vocabulary”. Closure, as used in the “gutters”, or spaces between panels, is its grammar.

I also thought the breakdown of the types of closure – i.e., subject-to-subject, scene-to-scene, etc – and the analysis of the evolution of Japanese comics, as a reflection of the Japanese culture, was very interesting as well.

Chapter 4 was a discussion on the breakdown of the passage of time, which was compared to photographs and the way we typically experience time. My notes include: “Time in comics is different from photographs; we may see several moments in time arranged within the same panel. In photos, the action is all from a single moment….” and “[in comics] time breaks down into panel-to-panel closure[s].”

Chapters 5-8 discuss the impact of line, and mixing of words and pictures. Points I found interesting:

  • Expressionism and synaesthetics are distortive by nature and can obscure their subjects.
  • In a visual medium, the visual sense has the burden of taking in all the other senses.
  • Words have become more simple, while art became representational & specific.
  • New media have been misunderstood – first beginning as an imitation of the previous media
  • People find art in all aspects of human life, outside of the basic human instincts.
  • Most comics artists don’t use color, because it’s expensive and can take away from the meaning of the comic, or art, itself.

Points I found interesting in Chapter 9:

  • All media of communication are a by-product of our inability to communicate to others what it’s like to be ourselves
  • Each media converts thoughts into forms that can traverse the physical world and can be interpreted by another of our senses – taste, sound, sight, etc.
  • Mastery of a medium is the degree (percentage) that the artistic vision can survive the journey from artist’s thought to perception by others
  • Comics use cartoons to command viewer involvement and identification; and use realism to capture beauty and complexity of the visible world
  • Embedded in all pictures are the seeds of expressionism and synaesthetics.
Phys Comp – Week 4: Stupid Pet Trick

We were assigned to create a “stupid pet trick” which combines a bunch of stuff we’ve learned in our previous few weeks. It doesn’t have to be logical, which is why it’s called stupid. Some of my classmates made really awesome stupid pets, that weren’t really stupid at all. Mine, I admit, is a little goofy.

For now, I’m going to call it, “The Pickup Artist Bear, for Sensitive Gals and Guys”. Here’s how it works:

Step 1 – The Pledge: The Bear finds someone he/she would like to pick up. Bear sings a sweet song to attract Gal/Guy.

Baa Baa Black Sheep

To play the song, you press a button. I installed my button within the neck of the teddy bear.
The song plays while the button is pressed. When you let go of the button, the music stops. When you press again, the song starts off from where it left off.
When you get to the end of the song, the music starts again at the beginning.

Button switch + teddy bear

Step 2 – The Turn: Guy/Gal is sufficiently impressed with sweet, sweet song. Bear continues the pickup by helping Guy/Gal build self-confidence by showing you how tender your caresses are – and in the process, shows off ability to be affectionate.

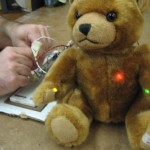
For this, you squeeze the Force Sensing Resistors on the breadboard. To do this, I’ve set up 2 analog inputs which take a variable level of force not equally set. So, the same level of force for the Green light will not necessarily work for the Yellow. If you light them both, the red light comes on and teddy bear’s heart lights up. It’s a little bit tricky to do actually, and you can adjust it to really annoy your friends.

Bear lights up when you show him love

Step 3 – The Prestige: The bear has now sufficiently won the heart of Gal/Guy, and now gets you to really show your affection. Bear asks Gal/Guy to spill secrets. Bear shows happiness.


Phys Comp: Week 3 – Electronics

This week, our Phys Comp lab consisted of combining several previous labs plus the addition of using our multimeters to check the current of electricity. Checking the flow of electricity is something I’ll need to get used to doing, starting with just learning how to read the multimeter dial and learning to choose between A/C or D/C. Anyway, here are my steps:

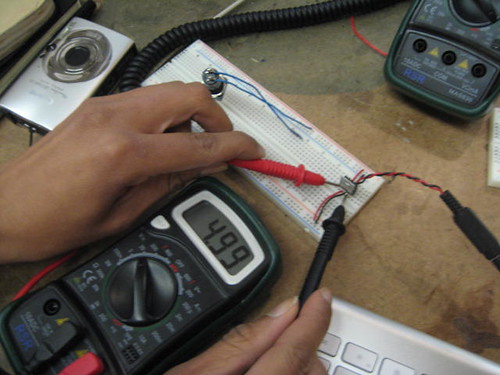
A. Measuring Voltage: I set up the breadboard with a voltage regulator and a 12V A/C adaptor. Then I tested the input to and the output from the regulator.

Testing input (approximately 16 V)

B. A Basic LED Circuit: Next, I added a switch and an LED to the breadboard. This is when the voltage regulator came in handy, to decrease the amount of voltage coming into the circuit that the LED was attached to. (If not, it would have been too much current for the LED. That’s also why the regulator was so hot, the extra energy was being emitted as heat.)

Using a switch to turn on an LED

C. Components in Series/Parallel: This experiment showed how parallel and series circuits work. Series circuits work like Christmas lights all in a row – when one goes out, the circuit is broken. Parallel circuits share the current, so if one goes out the other lights stay on.

3 LEDs in parallel
3 LEDs in parallel
Completing the circuit using the multimeter

D. Variable Voltage with a Potentiometer: This was pretty similar to “A”, except that now I was using an analog switch to adjust the output of an LED.

ICM: Week 2 – Using variables and interactivity in Processing

This week, I used the same concept from last week but I used variables to reduce the amount of code I was drawing. I also added an interactive element. Now, when you use your mouse to move left to right across the screen, the background changes from 255 (white) to 0 (black). The alpha level of each bar is still set manually, and choosing how much to decrease the level was somewhat mathematical but the level doesn’t decrease evenly. (This became a problem the next week when I used objects to create the sketch.) I like how it looks like there’s so much more to drawing the bars than just a change of alpha level.

ICM Week 2

Color bars, Week 2

Phys Comp: Week 2 – Analog sensors, Part 2

This week’s assignment consisted of coming up with a fantasy device, and possibly going crazy using analog sensors. I did both.

First up: the UV-Sunlight watch. This watch detects how much sunlight you’ve received. The benefit to the wearer is that during winter months, you’ll know when you haven’t gotten enough sunlight, and during the summer you’ll know when you’ve gotten too much. I really thought about the design of this one, which may not have been the point, but I do like the final product.

It’s fairly practical and useful, and it was fun to make. But, I would, maybe, agree with the argument that it’s not that fantasmal. Hence, my second fantasy device.

The Unicorner! I learned by the age of six that most humans are incapable of viewing true unicorns. So try as I might, I have never seen a unicorn. My device changes that. This device changes the assumption that there are no unicorns in the world by revealing the true identity of what appear to be ordinary horses, by transforming them into unicorns so that humans can see them! It only works if they were really unicorns to begin with, but it’s only $49.95. It took me under 10 minutes to make, but I added the plastic bag and UPC code later, so maybe 15 minutes of work.

Other ideas included:

  • a camera that takes pictures of your food and reports the nutrition content
  • an alarm clock that mixes smells and sounds, like cinnamon rolls + Paris cafe, and bacon + New York diner.
  • a musical device for orchestra and band students, that plays back a pre-recorded song so that your band leader/conductor can’t tell when you’re playing out of tune. (Note: will not actually help you learn to play an instrument).
  • a remote control to make a parent slower and decreases the volume of their voice
  • an iPhone app that tells you if a store you’re in front of has your size in stock

Finally, I again took apart my teddy bear and hooked up light switches to two FSR sensors. When the hands of the bear are squeezed, the lights come on. But, because I put variable input into the Arduino, it’s difficult to get them both to light up simultaneously. I will add video later.

Code is here.

int ledPinGreen = 10; // Green pin
int ledPinRed = 9; // Red pin
int ledPinWhite = 11; // White pin

int analogFSRLeft = 0; // Left analog input
int analogFSRRight = 1; // Right analog input

int FSRValueLeft = 1; // Value of the left FSR
int FSRValueRight = 1; // Value of the right FSR

void setup() {
// initialize serial communications at 9600 bps:
Serial.begin(9600);
}

void loop() {
FSRValueLeft = analogRead(analogFSRLeft); // read the left FSR value
// if FSRValueLeft is under 300
// light nothing
// if FSRValueLeft is between 300 and 600
if( FSRValueLeft > 250 && FSRValueLeft < 375  ){
analogWrite(ledPinGreen, FSRValueLeft/4);
} else {
digitalWrite(ledPinGreen, LOW);
}
Serial.println(FSRValueLeft); // print the FSR value

FSRValueRight = analogRead(analogFSRRight); // read the right FSR value

// if FSRValueLeft is between 300 and 600
if( FSRValueRight > 200 && FSRValueRight < 750  ){
analogWrite(ledPinRed, FSRValueRight/4);
} else { // do nothing
digitalWrite(ledPinRed, LOW);
}

/*  FSRValueRight = analogRead(analogFSRRight); // read the right FSR value
FSRValueLeft = analogRead(analogFSRLeft); // read the left FSR value
if( FSRValueRight > 200 && FSRValueRight < 750) && ( FSRValueLeft > 315 && FSRValueLeft < 380  ){
analogWrite(ledPinWhite,  FSRValueLeft/4,  FSRValueRight/4);
} else { // do nothing
digitalWrite(ledPinRed, LOW);
digitalWrite(ledPinGreen, LOW);
}
*/
Serial.println(FSRValueRight);  // print the FSR value

delay(10); // gives a 10 millisecond delay
}

Phys Comp: Week 2 – Analog sensors, Part 1

This week we worked with analog sensors.

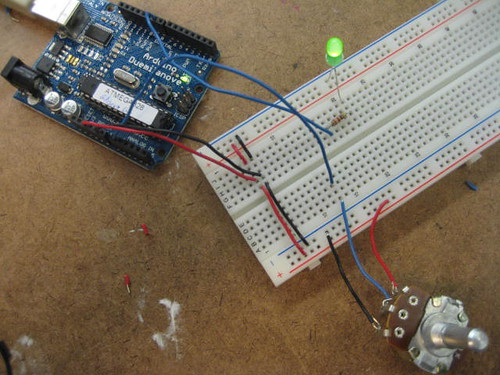
For the lab, I was able to correctly set up the breadboard, Arduino, and potentiometer to create my first analog input. I documented along the way.

Then I made a two-input analog switch with two LEDs as output. Here’s the code:

int ledPinGreen = 10; // Green pin
int ledPinRed = 9; // Red pin

int analogFSRLeft = 0; // Left analog input
int analogFSRRight = 1; // Right analog input

int FSRValueLeft = 1; // Value of the left FSR
int FSRValueRight = 1; // Value of the right FSR

void setup() {
// initialize serial communications at 9600 bps:
Serial.begin(9600);
}
void loop() {
FSRValueLeft = analogRead(analogFSRLeft); // read the left FSR value
analogWrite(ledPinGreen, FSRValueLeft/4);
Serial.println(FSRValueLeft); // print the FSR value back to the

FSRValueRight = analogRead(analogFSRRight); // read the right FSR value
analogWrite(ledPinRed, FSRValueRight/4);
Serial.println(FSRValueRight);

delay(10); // gives a 10 millisecond delay
}