Deep Dive: E-Commerce Redesign for Luxury Retailers

As a freelance UX Designer for Publicis Sapient, I worked with a small team to redesign the e-commerce website of a luxury retail client.

Summary

The goal of this project was to redesign e-commerce sites for a NYC-based luxury retailer and partner sites. The sites would be migrating to a new backend platform.

  • Role: UX Research and Design (Experience Lead)
  • Design Tools: Sketch, InVision, Keynote
  • Collaboration Tools: Skype, Microsoft TeamsBox; Zoom (client)

Challenge: The challenge for the design team was that all sites would be migrating to a new platform. Solutions needed to work for all three. And they needed to be mobile first.

Team: I reported to the Associate Creative Director (UX). Other team members included the Design Director (Visual design), and two art directors. The project manager was the final core member of our team.

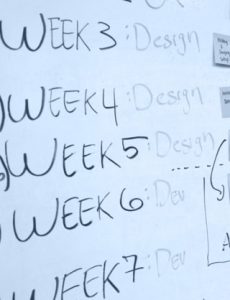
Phases of Work: Our work was completed in 2 phases. In phase 1, we focused on identifying best practices. In phase 2, we focused on completing the design.

Publicis Sapient calls itself a "digital business transformation company". Its headquarters are in Boston, MA.

Phase 1: Best Practices

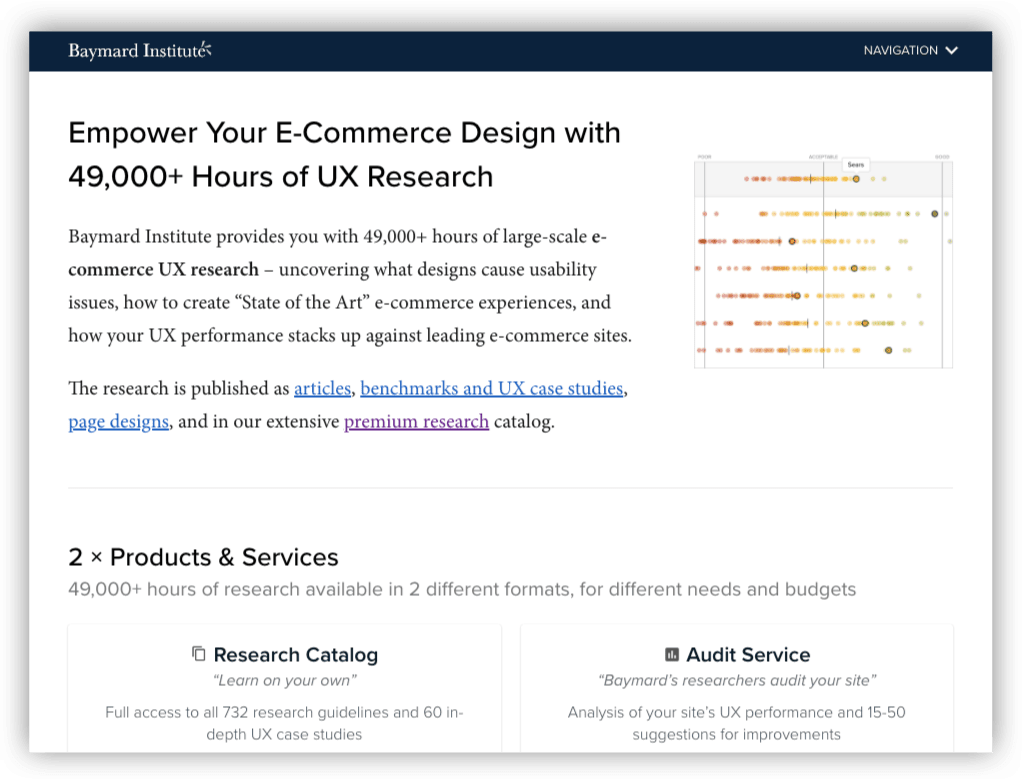
The early UX phases of the project centered on finding examples and best practices for e-commerce websites. Many best practices came from the Baymard Institute, as well as other expert sites like Nielsen Norman Group (NNG.com).

Screen capture of baymard.com
Home page for Baymard.com

The best practices were organized by page or section, such as home page, product detail pages (PDP), and checkout.

We presented the best practices with screenshots of example sites, the current sites, and “out-of-the-box” functionality for the backend platform.


Surprising Finding About Quick View: Don’t Use It

One best practice that surprised me involved the use of Quick View. Baymard Institute identified that around 48% of websites utilize Quick View on product listing pages. However, their research concluded that “Quick Views are often symptom treatments for poor product list designs.” Therefore, the priority would be to create strong designs for the product list pages rather than create a new design for Quick View.

Screenshot
Baymard Institute recommends avoiding ‘Quick View’ overlays and advises focusing on building better product list pages.

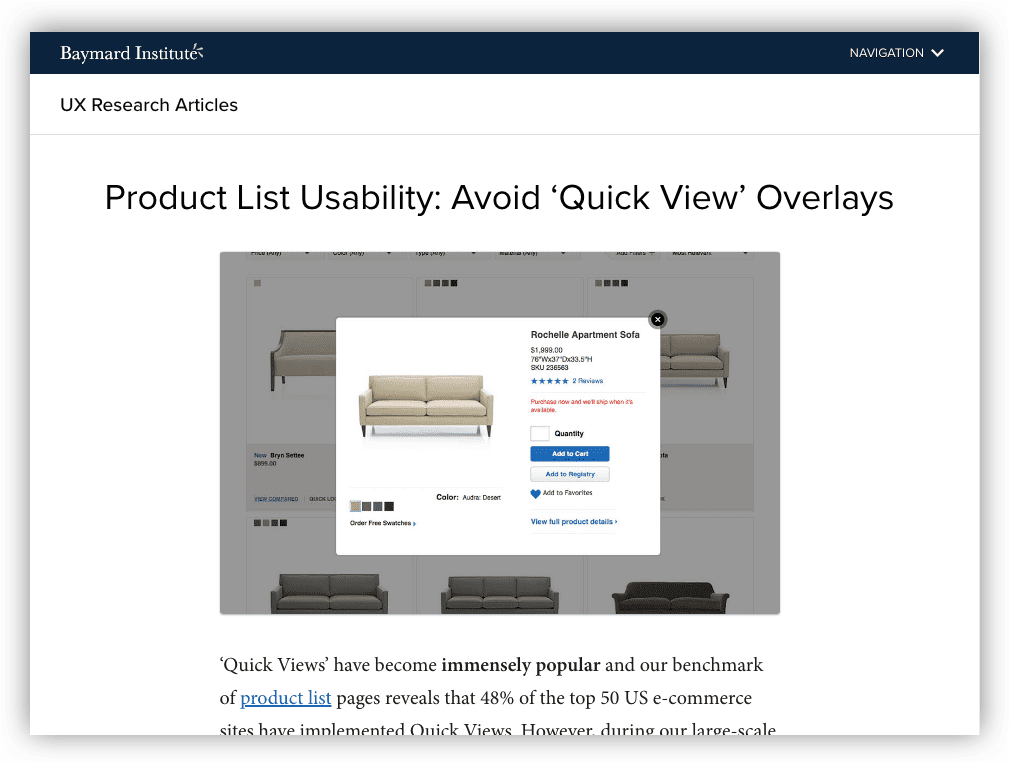
Learn more about this finding on their blog: https://baymard.com/blog/ecommerce-quick-views


Early UX Collaborations with Visual Design in Phase 1

Starting out, the visual design team concentrated on UI foundations, like building a pattern library and exploring typography, etc. We collaborated in a few of the following ways:

Whiteboard with drawing on it.
Depiction of whiteboard exercise.

Shopping Journeys: As a team, we also discussed various shopping journeys to address specific requests from the client.

Information Architecture: We also discussed information architecture and iterated on multiple sitemap options, reviewing the current site, similar sites, and consulting with the tech team.

Phase 1 Conclusion

Phase 1 concluded with a focus on aspects of the product page, shopping journeys, and best practices.


 Phase 2: Design Sprints

Whiteboard with a schedule
Depiction of sprint planning.

Our goal starting Phase 2 was to complete several rounds of sprints. The work would include most of the site, starting with PDP. A few highlights from the start of Phase 2:

Design-Pairing on PDP: In the first month, I closely collaborated with one of the art directors on an early design of PDP. We discussed various options for page elements, like product descriptions and reviews. I gave feedback on functionality and usability.

Annotations for Visual Design: I also supported the visual design team that first month by creating annotations for visual designs, which were uploaded to Confluence.

Responsiveness & Functional Limitations: Throughout the project, I worked with the development team on understanding functional limitations and keeping the layout responsive.

Mid-Project Refocus Towards Global Nav and Framework

As with many projects, plans changed and our work refocused:

Refocus on Global Nav and User Profiles: We redirected our efforts towards the global navigation and user profiles, instead of the shopping journey. The work would now include global header/footer, sign in, account creation, favorites, purchase history, password, etc.

New Client UX Lead, Refocus on Design Framework: On the client side, a new UX team lead with a focus on longer-term goals — including a design framework for all three brands to use.

How Initiative and Collaboration Helped Build a Design System:

At one point in our sprint cycles, the client requested the team start building a design system. The request came with a prioritized list of components from the branding team. As the team reviewed the list, it became clear that the naming convention used by the client created some confusion and made it difficult to get started.

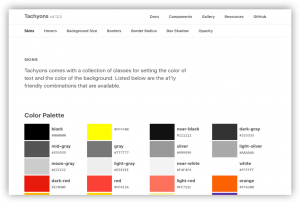
My experience with design systems comes from using or playing around with tools like Basecamp, Foundation, or Tachyons.

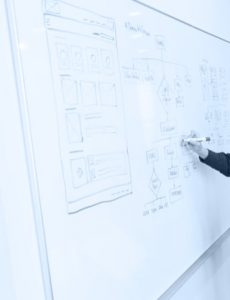
When I saw the list, I started thinking about how to break down the designs into smaller elements, so that they could be combined again in increasingly complex ways. Rather than explain my ideas, I thought it best to show the concept.

I created a Sketch document that showed how even the most complex component could be created from combinations of individual elements, as long as they obeyed certain functional rules. The outcome was the design team was able to use my document in establishing a base for the design system. At the end of the sprint, we presented our concepts together.


Outcome

Eventually the UI and UX teams split into two. The visual team supported the design framework/UI and the UX team continued the product design/wireframes.

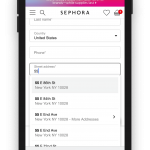
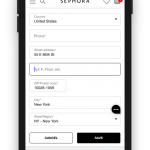
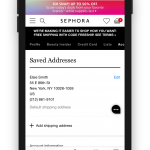
The UX team focused on screens associated with user profiles, including purchase history, favorites, communications, user registration, address book, etc. We spent a lot of time iterating on form design and mobile layouts.


Screenshot references

Newsletter sign up for Dune London, a UK based retailer.

My Week Note blog posts document some of the tasks I completed in Phase 2. They can be found for March, April, and May. A few highlights are below:

  • Created wireframe desktop layout options for account profile dashboards in Sketch
  • Created workflows to map proposed account profile functionality, including update address from account profile and checkout, communication preferences, and expired cards/payment methods
  • Worked with the visual design lead and UX associate director to prep for a client presentation on wireframes and visual design of requirements
  • Included a table within the wireframes to map processes between systems, for better messaging for the customer

If you visited this blog post from my website, you can jump back here.


Sidenote

It sounds like science fiction, but right in the middle of this project a new and deadly virus spread across the United States. A global pandemic was declared. The city of New York became the hardest hit locality in the United States. In the early weeks of March, we stopped travel to the client’s location and the main office. For 2-3 months, all work became remote.

However, back in 2017, I wrote this blog post with tips for better conference calls. The remote work affected some members of the team more than others, but we were able to find new ways to collaborate using online tools and lots of patience.

Macrame knots

Someone mentioned in my last Materials class that perhaps macrame might be a good option for attaching the wood pieces to each other. I don’t know much about macrame, but just checking today, I found this website with some fairly easy patterns.

I made a test piece using a Loop knot to make a Chain braid. It’s flexible, as Olga mentions on the site, which means that it will help solve my problem of how to wear the dress and still have the flexibility to move around.

I’m not sure of how to attach the macrame pieces to the wood…but maybe I can use some type of small metal ring. I’m going to try connecting some pieces together and see how it goes.

Wooden Dress

Finally, after many tears, I have an idea for my Wearables final! (And, for Materials, too.)

In one of my Wearables classes, we had a workshop where our instructors, Despina Papadopoulos and Zach Eveland, went around to give each of us some one-on-one feedback about our projects. Up until this point, I’d been working along the route of making a pair of pants that turned on a switch or something when you walked. The idea came from thinking about the inner thighs or legs, which seem to come as a “target” area for exercise. But, honestly, my design really didn’t work for a few reasons. I wanted riding pants which someone self-conscious about their inner thighs probably wouldn’t wear. Then, it didn’t really seem to thoroughly reflect a lot of the research I’d previously done.

When Despina came over to see how I was doing, she had difficulty understanding my idea, and we went into the classroom to talk using the whiteboard. Well, she ended up asking a lot of really good questions…that sort of caught me off-guard…on a day or week when my confidence level was WAY low. I sort of ended up breaking down…. Despina gave me some really great encouragement and basically told me that I can’t fail in trying to do something, so I shouldn’t feel like my ideas are crappy. Eventually, I rejoined everyone else, and went back to brainstorming. By the end of that night, I’d already sketched out a new idea. And really, I just figured, “You know, just try it. If it’s crappy, fine.”

While I was thinking of my new idea, I thought of just one part of the body. The skin. And, in relation to my research, I obviously thought of skin color. And then I thought of what could represent skin color. In my Materials class, Peter Menderson showed us some really nice wood veneer samples, for different types of wood and in different colors. Different brown colors…like skin.

Wood. Skin. A wooden dress.

So, right after that night, I immediately started prototyping. First in paper, then in foam core. I used twine to connect the pieces, which I eventually secured with hot glue. So now I have a full dress. I actually can wear it – luckily for me, one of ITP’s dress forms pretty much has my measurements.

Now, I’ll need to look into different types of lumber, wood stains, connections – metal, twine, leather…? – and also just adjusting the height/width of each piece. Fully, my idea is to make a series of wooden dresses, from dark to light, representing a range of skin tones. Unfortunately, given the amount of time left, I don’t think that’s possible.

High-Level Ideas Regarding Final: Body Image

During the final discussion during our last Wearables class, I started thinking about two subjects. One is my own past and the other is the user of my wearable design. Thinking back on my past life when I was immersed in ballet training, in all that time I don’t think there’s ever been a point where I’ve met a ballet dancer, male or female, who wasn’t preoccupied with some part of their body. What sizeSo this brought me to the subject of body image. The user is someone focused on body image. My high-level idea is to make a series of weighted vests for the anorexic, each vest representing the amount of weight she’s lost. The vests are not just to call attention to the wearer’s extremely small and unhealthy size, but to call attention to how acceptable it is to have a negative view of our body image.

For my initial research, I’ve found articles, images and websites focused on a few main topics, such as body image and body shape, different examples of the female body throughout history, fashion/garments for slenderizing (i.e. corsets), and eating disorders. There are a few overlaps between some of the links, but these are mainly my areas for now.

Examples in Art and Media

This Peter Paul Reubens painting, from 1622-1625, shows an example of the classical female figure. The female figures are quite volumptuous, and display rolls of fat around their abdomen and legs, as they bend their torsos and legs (though the one on the right appears to be growing the tentacles of an octopus).


Model Lizzie Miller recently posed for Glamour magazine, and in doing so created either a trend or a firestorm in fashion. Her photo shows her sitting pretty much completely nude, yet also showing an “unfashionable” belly roll.


Though she is clearly a beautiful women, the article states that this model is considered “too large” for plus-sized fashion. The article, which can be found here, goes on to discuss how women across the world are seeking change to modify their appearance. Body image is definitely on the mind.


But, is “bigger” in? Perhaps. It seems also that the use of models of average size and larger, have recently been seen during this year’s Fashion Week gracing the runways of some major designers.

A new ABC Family drama, “Huge”, fictionally depicts the ‘Real World’ style life of a group of teens at a fat camp. The exploitation continues with another (non-fictionally) reality series, which is (unbelievably) called “Thintervention“. It features a personal trainer, who arguably has taken her exercise routine just a little too far, and a group of about 5-7 overweight people who she and her team attempt to train.

Clearly, there’s a disconnect between beauty, fashion and glamour, and what’s popular and deserves to be on TV. Runway fashion tends to make it to the mainstream market, eventually, in some small part. That shows acceptance, but I have a hard time believing that this overwhelming obsession with body image will go away anytime soon. It’s too widespread and it’s been around for a while.

“The body has become a casing for fantasy…rather than a place from which to live.” (Susie Orbach, author of Fat Is A Feminist Issue and Bodies)

Body Modification and Corseting

As I mentioned earlier, a previous article gave many examples of women modifying their bodies, referring to some rather extreme cases of plastic surgery. But, referring back to talking about how fat we should not be, I also looked into the history of corsets as a form of creating the illusion of a waist and a form of body modification, more so now than during their height of fashion. The first designs for corsets, in the 16th and 17th centuries, were called ‘stays’ and they were more for the accentuation of the bust than the waist. Following this and some changes in women’s clothing styles, corsets were reinvented for the effect of cinching the waist by the mid 19th Century. The idea of tightly lacing the corset began at this time, and for some still continues today.

Tightlacing has the effect of displacing a woman’s internal organs and deforming the lower ribs. Some women have and still attempt to achieve waists as small as 16″ in diameter, though this requires wearing a corset about 23 hours a day, 7 days a week. Meanwhile, though women’s figures have actually gotten bigger, many women still desire a tiny waist and some have turned to other measures to achieve the “ideal” weight.

Negative Body Image

Around the world, the fight to achieve a perfect body image continues, sometimes manifesting itself in nationwide self-loathing. For instance, only 5% of Argentinean women are satisfied with their body image, and it’s even been documented that girls as young as 7 have developed some form of an eating disorder. American’s, also dissatisfied, spend billions on weight loss, dieting and exercising every year. Billions more are spent on plastic surgery to help make ourselves beautiful.

It’s not really important to go into the specific statistics as much as it is to acknowledge that body image is a big issue. The persistence with which we have some negative issue with how we look is prevalent and persistent, and this will continue to be so for a very long time. My project(s) attempts to not only embrace our poor image of ourselves, but to also reward the wearer for achieving what so few apparently cannot. At the same time, the effects of this achievement would require the wearer to lose a significant and unhealthy amount of weight, and as the vests got heavier, the wearer wouldn’t be able to actually wear them because they would be too thin.

I’d like to add more items to this vest project, dealing with body image. I’m considering an electric-microphone component, maybe embedded into the collar of the vest, that converts a speaker’s deep confessions to some type of mumbled, garbled computer words. A way to share your thoughts, without truly sharing your thoughts.

Specifically thinking about the design of the vests, I have a modern style in mind, but since I’m just gathering my thoughts at this point, I’d rather stay generic and ambiguous for now.

Additional References:

Learning Clothes, at Fashion Camp NY 2009

Get your Fashion Camp 2009 poster
Fashion Camp Poster

I’ve been thinking about having my own sewing machine for a few years now. I guess I never bought one (that worked properly) because I keep moving around the country too much. Anyway, I think now’s the time. I used a sewing machine occasionally in college, but since then I haven’t had the chance to try again. However, I’m really excited about the chance to try to make my own clothes, and find myself coming up with ideas all the time.

I wasn’t sure how I’d really learn how to make something until…ta-da! I learned about Fashion Camp NY 2009 to be held at ITP this weekend! Oh, joy!

Apparently, Fashion Camp is “Mainstream Fashion, Indie Fashion, and Wearable Technology come together for a weekend of open workshops, presentations, and networking.” So, using a sewing machine is pretty basic, compared to, say, wearable technology? But, still, it’s a weekend of free classes about how to make clothes, or how to think about clothes, or envisioning new fashions, or whatever…. It’s free!

I doubt Anna Wintour will be coming, but if just in case she does, maybe I should think about shining my shoes? If you want to attend and probably not see Anna Wintour, RSVP on the FashionCamp website.